Browser Support
Confidential Sapphire dApps work in web browsers by wrapping the Ethereum provider such as Metamask to enable signing and encrypting calls and transactions.
Let's begin with the Hardhat boilerplate. As mentioned on their website the boilerplate provides the following:
- The Solidity contract implementing an ERC-20 token
- Tests for the entire functionality of the contract
- A minimal React front-end to interact with the contract using ethers.js
Go ahead and clone the original Hardhat boilerplate repo. Move to the checked
out folder and apply the Sapphire-specific changes to hardhat.config.js
as described in the quickstart.
Next, install dependencies. The boilerplate project uses
pnpm, but yarn and npm will also work with some modifications
around workspaces:
- npm
- pnpm
- Yarn
npm install
npm install -D @oasisprotocol/sapphire-paratime
pnpm install
pnpm add -D @oasisprotocol/sapphire-paratime
yarn install
yarn add --dev @oasisprotocol/sapphire-paratime
Now, you can deploy the contract on the Testnet with the private key of the account holding some TEST tokens:
PRIVATE_KEY="0x..." npx hardhat run scripts/deploy.js --network sapphire-testnet
This will compile the contract and deploy it on the Testnet. In addition
to the quickstart steps, the contract address and ABI will also automatically
be copied over to the frontend/src/contracts folder so that the frontend can
access them!
Signing Sapphire Calls and Transactions in Browser
Now, let's explore the frontend of our dApp. Begin by moving into the
frontend folder and install dependencies:
- npm
- pnpm
- Yarn
npm install
npm install -D @oasisprotocol/sapphire-paratime
pnpm install
pnpm add -D @oasisprotocol/sapphire-paratime
yarn install
yarn add --dev @oasisprotocol/sapphire-paratime
The main frontend logic is stored in frontend/src/components/Dapp.js. Apply
the following changes:
--- a/hardhat-boilerplate/frontend/src/components/Dapp.js
+++ b/hardhat-boilerplate/frontend/src/components/Dapp.js
@@ -2,6 +2,7 @@

 // We'll use ethers to interact with the Ethereum network and our contract
 import { ethers } from "ethers";
+import * as sapphire from '@oasisprotocol/sapphire-paratime';

 // We import the contract's artifacts and address here, as we are going to be
 // using them with ethers
@@ -22,7 +23,7 @@
 // This is the Hardhat Network id that we set in our hardhat.config.js.
 // Here's a list of network ids https://docs.metamask.io/guide/ethereum-provider.html#properties
 // to use when deploying to other networks.
-const HARDHAT_NETWORK_ID = '1337';
+const HARDHAT_NETWORK_ID = '23295'; // Sapphire Testnet

 // This is an error code that indicates that the user canceled a transaction
 const ERROR_CODE_TX_REJECTED_BY_USER = 4001;
@@ -225,14 +226,20 @@

   async _initializeEthers() {
     // We first initialize ethers by creating a provider using window.ethereum
-    this._provider = new ethers.providers.Web3Provider(window.ethereum);
+    this._provider = sapphire.wrap(new ethers.providers.Web3Provider(window.ethereum));

-    // Then, we initialize the contract using that provider and the token's
-    // artifact. You can do this same thing with your contracts.
+    // Then, we initialize two contract instances:
+    // - _token: Used for eth_calls (e.g. balanceOf, name, symbol)
+    // - _tokenWrite: Used for on-chain transactions (e.g. transfer)
     this._token = new ethers.Contract(
       contractAddress.Token,
       TokenArtifact.abi,
-      this._provider.getSigner(0)
+      this._provider,
+    );
+    this._tokenWrite = new ethers.Contract(
+      contractAddress.Token,
+      TokenArtifact.abi,
+      this._provider.getSigner()
     );
   }

@@ -294,7 +301,7 @@

       // We send the transaction, and save its hash in the Dapp's state. This
       // way we can indicate that we are waiting for it to be mined.
-      const tx = await this._token.transfer(to, amount);
+      const tx = await this._tokenWrite.transfer(to, amount);
       this.setState({ txBeingSent: tx.hash });

       // We use .wait() to wait for the transaction to be mined. This method
@@ -360,8 +367,8 @@
       return true;
     }

-    this.setState({
-      networkError: 'Please connect Metamask to Localhost:8545'
+    this.setState({
+      networkError: 'Please connect to Sapphire ParaTime Testnet'
     });

     return false;
Beside the obvious change to the chain ID and wrapping ethers.js objects with the Sapphire wrapper you can notice that we initialized two contract instances:
this._tokenobject will be used for unsigned eth calls. This is the Hardhat method of settingfromtransaction field to all zeros in order to avoid Metamask signature popups. Although the call is unsigned, it is still encrypted with the corresponding runtime key to preserve confidentiality.this._tokenWriteobject will be used for signed calls and transactions. The user will be prompted by Metamask for the signature. Both — calls and transactions — will be encrypted.
Trying it
Start the frontend by typing:
- npm
- pnpm
- Yarn
npm run start
pnpm run start
yarn run start
If all goes well the web server will spin up and your browser should
automatically open http://localhost:3000.
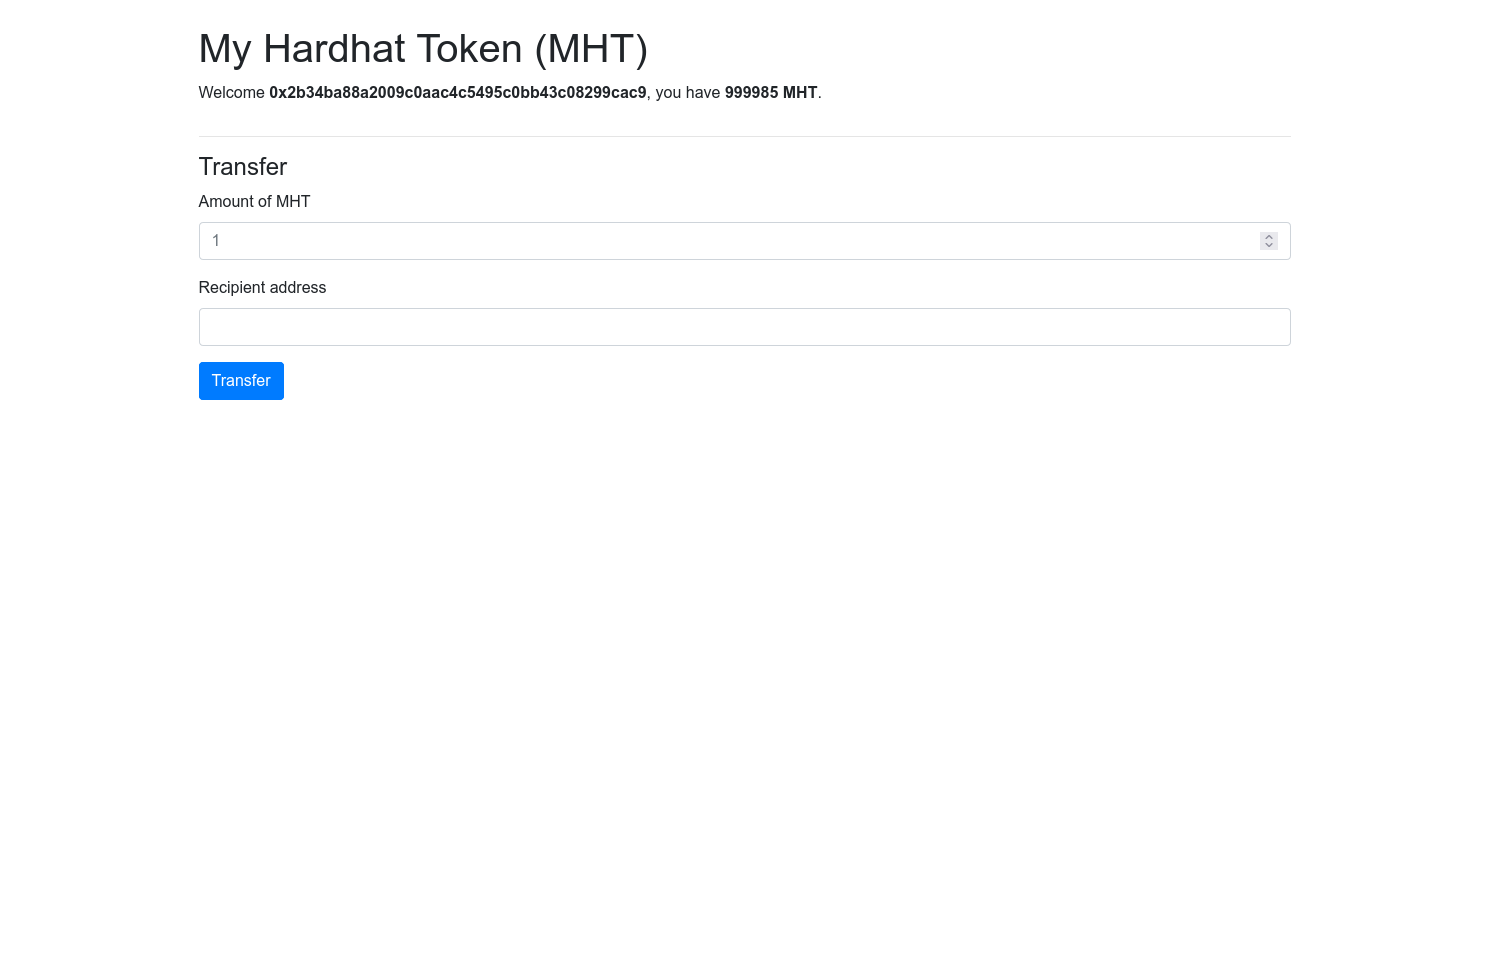
Go ahead and connect the wallet. If you haven't done it yet, you will have
to add the Sapphire ParaTime Testnet network to your
Metamask. Once connected, the frontend will make an unsigned
call to the balanceOf view and show you the amount of MHTs in your selected
Metamask account.

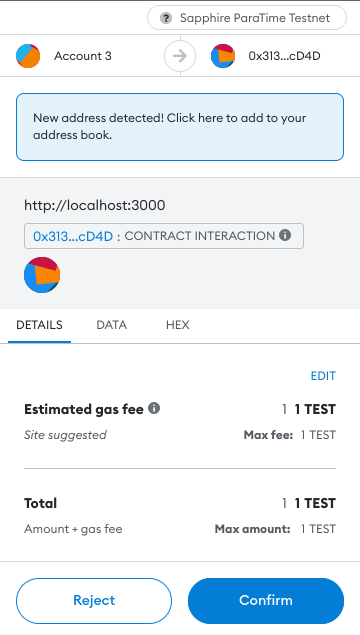
Next, let's transfer some MHTs. Fill in the amount, the address and hit the
Transfer button. Metamask will show you the popup to sign and submit the
transfer transaction. Once confirmed, Metamask will both sign and encrypt the transaction.

Once the transaction is processed, you will get a notification from Metamask and the balance in the dApp will be updated.
If you commented out emit Transfer(...), the transfer of MHTs would have
been completely confidential. In the example above, the following
transaction was generated. Go ahead and check your transaction
on the block explorer too, to make sure no sensitive data was leaked!
Congratulations, you successfully implemented your first truly confidential dApp which runs in the browser and wraps Metamask to both sign and encrypt the transactions!
Should you have any questions or ideas to share, feel free to reach out to us on discord and other social media channels.
You can download a full working example from the Sapphire ParaTime examples repository.
If your project involves building both a contract backend and a web frontend, we recommend that you check out the official Oasis starter files.